
This is a basic how-to on setting up AutoArchive in Microsoft Outlook.
Turn on AutoArchive (Global)
This section will teach you how to to turn on Autoarchive for your entire Inbox. If you want to learn how to turn on Autoarchive per folder, click Here.
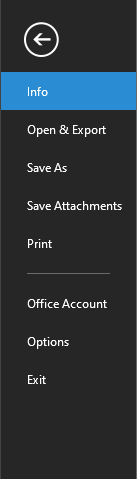
1. Click file.

2. On the left pane click Options.
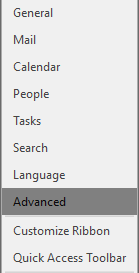
3. On the left pane click Advanced.
4. Under the AutoArchive click AutoArchive settings.

5. Check the Run AutoArchive every... box and select the how many often you want AutoArchive to run. The default option is 14 days.
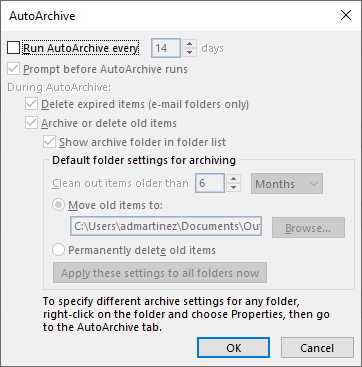
If you do not want it to delete items from your folders, uncheck Delete expired items. This only deletes them from the email folders, NOT the archive; It is checked by default.
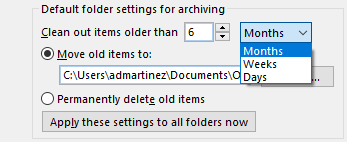
By default, the AutoArchive system will clean out emails that are older than 6 months. You can change the number to as low as 1, and a maximum of 60. You can also change the interval from Months to Weeks or Days.
Outlook will automatically specify the archive file and location for you. If you wish to change it, click Browse and select your archive file.
If you want these settings applied to ALL of your email folders click Apply these settings to all folders now.
6. Click OK.
This completes the global email AutoArchive set up.
Set up AutoArchive for individual folders.
This section will teach you how to set up AutoArchive for individual folders. Use this method if you're only concerned with archiving a few of your email folders instead of your entire mail box.
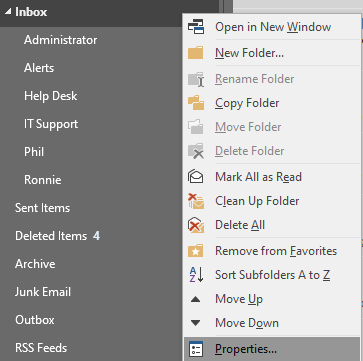
1. Find the folder you wish to AutoArchive. Right click on the folder and select properties.
2. Click on the AutoArchive tab.
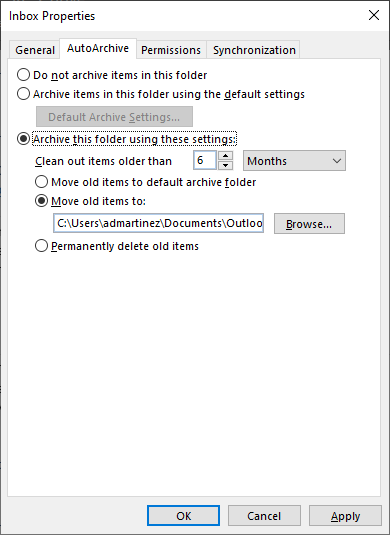
Here you can set up how you want AutoArchive to behave for this folder.
You can set this folder not to use AutoArchive if you have global AutoArchive turned on and you wish not to use it.
If you wish to set up archiving, make sure 'Archive this folder using these settings' is selected. You can specify the interval from 1-60 and the time interval from months, weeks or days.
Outlook will automatically create an archive file for you to use; if you have one you wish to specify, select Browse and browse to your archive file.
3. Click Ok.
Comments
0 comments
Article is closed for comments.